
As two professional photographers and wildlife lovers, Sophie and I had always dreamed of attending a Galapagos photography workshop.
When we learned how affordable travel was there and that you do not require any special permits to visit, we decided to pack all the cameras and host ourselves instead!
In April 2023, we made our dreams a reality with a two-week self-guided visit to Galapagos. We have been to some of the most photogenic destinations in the world, but this was unlike anything we had ever seen!
The wildlife is incredible, but there is so much more than that! With its volcanic origins and equatorial climate, the Galapagos archipelago is also home to spectacular landscapes.
In this guide, we will explain everything you need to know to plan your own photography trip to Galapagos. This includes travel advice, location-specific tips for shooting, the best photography locations for wildlife and landscapes, suggestions for underwater photos, recommended equipment, and plenty of inspirational photos from our visit.
🐢 Top 10 Galapagos Photography Tips
1. Bring a Telephoto and Standard Zoom lens


Assuming you are using a proper inter-changeable lens system, you will want to bring two lenses for the Galapagos: a telephoto lens in the 100-600mm range to use for birds, close-ups, and distant wildlife, and a wide-angle lens in the 24-105mm space for everyday photos.
While the telephoto lens is typical for wildlife photography, photographing animals in Galapagos is unique in that they are very tame and often closer than you are accustomed to getting.
Additionally, most of your time on the Galapagos islands will be spent in the salty ocean air and over sand, which are the least ideal circumstances for lens changes.
If you have two cameras available, just bring them both with one of each lens. Otherwise, A 24-70mm or 24-105mm lens will likely be the lens you use most.
🐢 FIND MORE INSPIRATION:
BEST THINGS TO DO IN GALAPAGOS
2. Equip a CPL Filter

If you are unfamiliar with circular polarizing filters aka CPLs, they are absolutely life-changing when shooting beaches and landscapes.
A CPL screws onto the front of your lens and can be rotated to increase or decrease polarization, reducing glare and reflections while enhancing colors.
They are essential when shooting coastal scenes like the Galapagos for bringing out the tropical colors in the ocean water.
While a CPL will not be useful for wildlife, it will not be detrimental, except in slowing down your shutter speed slightly.
Still, it is worth having on hand when shooting wide-angle scenes in Galapagos.
3. Stay still – let animals approach you

The animals of the Galapagos islands are famously tame. The best way to photograph them, especially when trying to include the human element in your shot, is to stay still and let them approach you!
This is especially true for sea lions and penguins, who are often curious and unlikely to be scared away except by sudden movements.
Understand that the Galapagos National Park law dictates you maintain a 6-foot (2-meter) distance from wildlife at all times.
It is possible to respect this law and the wildlife residents while still having some amazing encounters by simply remaining calm and still, allowing them to peruse freely.
⛵️ FIND MORE INSPIRATION:
BEST GALAPAGOS DAY TOURS
4. Use compression to Exaggerate Scale

If you are unfamiliar with the concept of compression, it is a technique/illusion where objects appear larger and closer in relation to their backdrop or other items.
Compression is achieved by standing further away from your subject and zooming in.
In other words, the distant objects will appear larger and fill more of the frame if you stand 100 meters away from your subject and zoom in than if you stand 5 meters away and use a wider angle.
Compression is a great technique for showcasing the impressive landscapes of the Galapagos and for maintaining distance from the animals and/or human subjects you wish to capture.
5. Use video frame grabs for underwater and fast-moving Animals

Underwater photography in the Galapagos is incredibly challenging as the water is often saturated with all sorts of particles and/or small fish.
These particles make focusing on that penguin or sea lion a nightmare as the camera continues to find debris instead.
What’s more, most marine life, especially sea lions, are in constant motion. Getting that perfect moment while a playful sea lion pup completes an elegant somersault is nearly impossible without the right equipment and years of practice.
Instead, consider using a GoPro or action camera on the highest possible quality video setting and recording these moments, then taking screenshots or grabbing individual frames back home on the computer.
In this way, you can turn specific frames of a video into fantastic photos.
🤿 DISCOVER MORE:
BEST SNORKELING IN GALAPAGOS
6. Photograph wildlife from eye level

This one is true for all wildlife, but needs to be mentioned; wildlife nearly always looks best when photographed from eye level or lower.
The top-down view that we are used to seeing as humans shrinks the subject, making them appear small and innocuous.
Instead, try to get onto your belly or at least down to your knees when photographing those low-lying marine iguanas, sea lions, or nesting birds. By shooting at a lower level, you provide proper size and authority to your subject.
This is especially true with underwater photos. While getting down to the ocean floor requires a bit more expertise in free diving, the results of shooting from here are worth the effort.
7. Get there early


No matter where you want to photograph in the Galapagos islands, you will want to arrive early if possible. All of the popular beaches and even the remote ones tend to fill up by noon.
With regards to landscapes and scenery, arriving early means your scene will be free of crowds and distractions.
Perhaps more important, however, is that the wildlife will be more engaging and plentiful early in the day before the masses start splashing around everywhere.
If shooting underwater from beaches, getting to your photo location early also will provide the clearest visibility. Once people start arriving, the amount of sand and debris they kick up in the water will be impossible to avoid.
🏝 READ MORE:
BEST BEACHES IN THE GALAPAGOS
8. Shoot both Narrow and wide angle
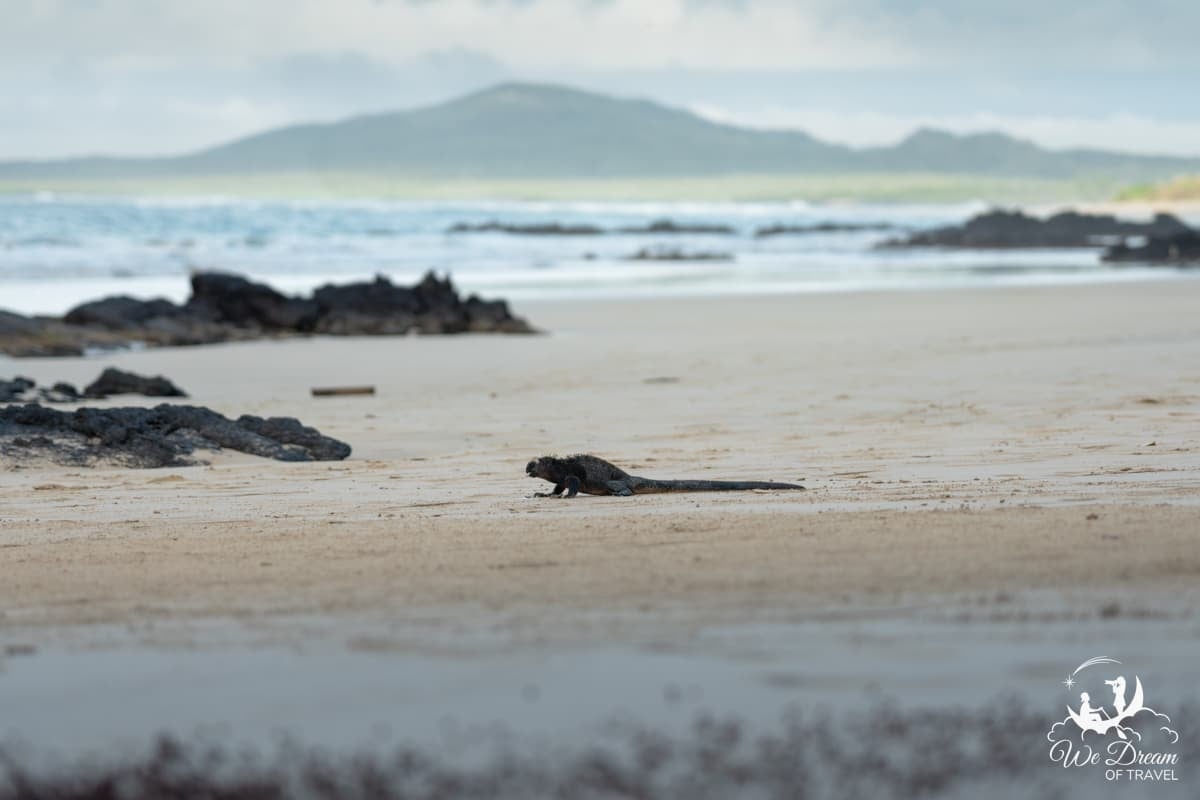


Close-ups are great for showcasing the true details of a subject, especially wildlife, and the right bokeh background can make for a stunning photo.
However, it is important to also look for shots that showcase the incredible destination you are visiting.
A sea lion close-up could have been shot literally anywhere in the world, but that photo of it sitting on a bench? That is 100% Galapagos.
The Galapagos archipelago is best known for its tame wildlife, but it also has some incredible landscapes and scenery owed to its volcanic legacy. The best photographs manage to capture the essence of a place, and including scenery with your subject is a great way to do that here.
These photos will also be for your personal memories. It is as important to capture the “where” as the “what”.
9. Pick the Right Time of Day for Each Subject


While the golden hours get all the attention in photography, it is not always the best time to photograph.
Indeed, the best time of day for photography in the Galapagos is entirely dependent on what and where you are shooting, and broad daylight is actually often best!
Underwater photos, for example, are aided by as much sunlight as possible. As this will likely be a big portion of your visit, you will actually want to maximize your mid-day time, especially on clear days.
Tropical settings also photograph best when the sun is overhead to bring out the colors in the water and landscape. At sunset, you do not get the same variety of blues and greens that you will see on the coastline during a sunny day.
Even wildlife is typically going to be best captured when the sun is overhead and providing ample light. This is, of course, more dependent on the setting.
Sunset will often be great for landscapes and occasionally for wildlife, but is less of a priority when shooting in the Galapagos islands as in most other places.
10. Do Your Homework


The wildlife on Galapagos is far less “wild” than anywhere else on the planet. In fact, the animal inhabitants of these islands are perhaps the most predictable and certainly the most tame on the planet.
Know where and when to go for the wildlife encounters that excite you most prior to visiting. By doing a bit of research, you can almost ensure the vast majority of the animal interactions you are hoping to experience.
To make it easy, we have included a quick highlight reel of the best places to find the most popular Galapagos animals further down in this very guide.
🗓️ FIND OUT MORE:
BEST TIME TO VISIT GALAPAGOS ISLANDS
🤿 Top 5 Underwater Galapagos Photography Tips

Some of the best opportunities for wildlife photography in the Galapagos will come while snorkeling, whether that be a playful sea lion, curious penguin, hungry turtle, or cruising ray.
Even if you are an experienced photographer, shooting underwater is a very different thing and comes with some major challenges.
For example, changing your settings once in the water is difficult or impossible, depending on your camera and housing. Focusing can also be a nightmare as debris and particles confuse the sensor, not to mention reducing clarity.
Below are our top tips for making sure you come away with some trophy photos from under the sea.
🤿 DISCOVER MORE:
BEST SNORKELING IN GALAPAGOS
1. Use screenshots or frame grabs from videos

Using video frame grabs is the most reliable way to ensure you get some incredible photos underwater.
True, the resolution will not be as good as with a true photo, but as long as you are recording at the best possible resolution they will still be very good.
There are several reasons we recommend this method: no missed focus, no motion blur, better stabilization, your choice of frame-by-frame moments to isolate, and you’ll ALSO have a video to go with your photos.
We used a GoPro Hero 11 and ended up preferring most of what we go with this to all but the very best of what our underwater camera was able to snap because there were just too many misses with the camera.
2. Get closer to your subject than you think you need to


Water is significantly denser than air, meaning you lose detail, color, and sharpness exponentially more quickly when photographing underwater than on land.
Additionally, there will typically be debris and plenty of particles in the water around the Galapagos archipelago, meaning visibility is not as good as one would hope for.
Anything more than a 24mm equivalent zoom lens is almost useless in anything but the most pristine ocean water; you will need to get close to your subject if you want any detail.
This can be tricky if you are an inexperienced swimmer but should be the goal. This is doubly true if you are using a GoPro or similar action camera as your subject will appear further away just based on the super-wide angle lens these use.
Some of this can be helped in post-processing, but may surprise you how difficult even that tends to be.
3. Bring your own snorkeling gear
Disclosure: At no cost to you, we receive a small amount for any purchases made using the links below.

All of the beaches in the Galapagos offer a chance to swim with wildlife for free, without needing to arrange a tour or guide. All you need is a mask and snorkel!
Renting on the island can be difficult and even when you do, the loaners are often ill-fitting.
You will be using your snorkel gear a LOT, so it is best to bring your own that you know fits right and enables you to go underwater anywhere any time. Fins aren’t essential, but they will make swimming substantially easier.
If you wear glasses, you will absolutely want to invest in a prescription snorkel mask to ensure you can see well in the water.
4. Stay calm, let animals come to you
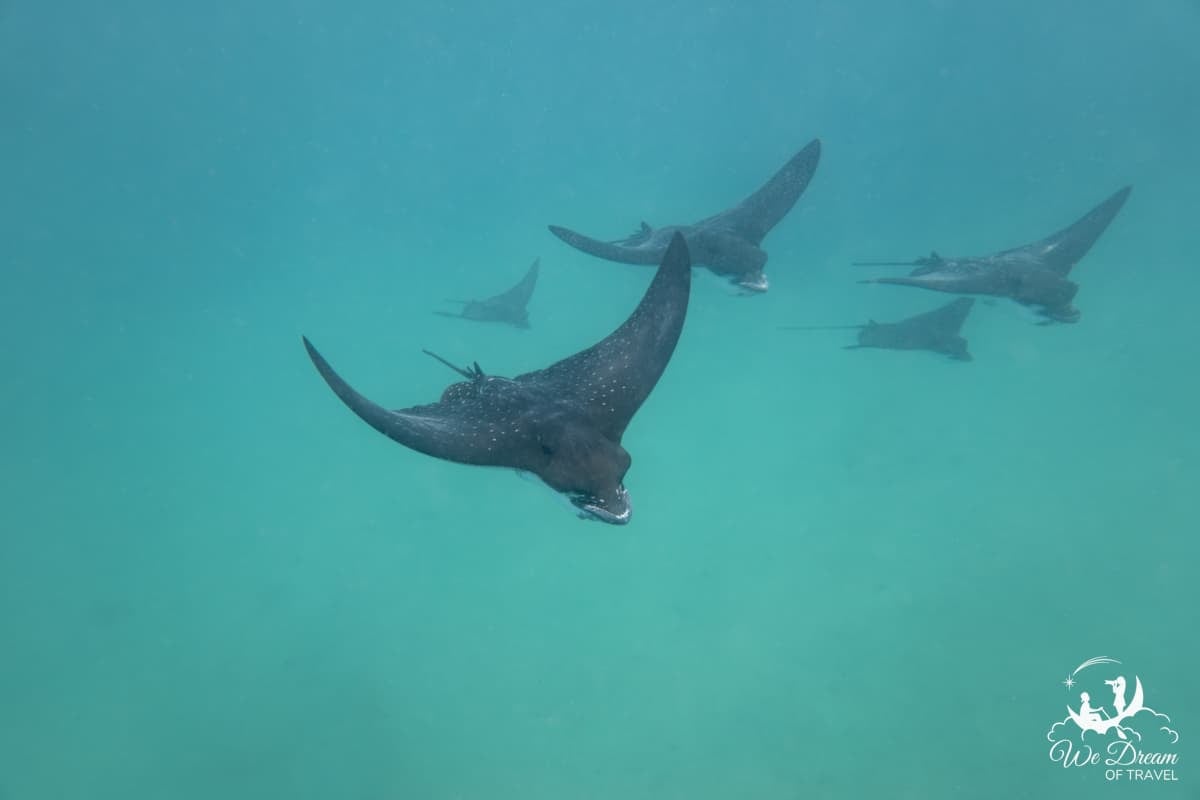


The animals of the Galapagos islands have evolved without predators, making them tame, curious, and often playful.
You are not allowed to approach within 6ft (2m) of wildlife in the Galapagos, but if you relax and stay calm, they will often come to you!
This is especially true of sea lions which are known as the “dogs of the sea” due to their playfulness. In fact, the young sea lion pups will often join you in a dance if you spin and interact with them (just never touch!).
Of course, it is still important to be mindful and respectful of these WILD animals, this is their home and they have the right of way. Never attempt to touch them and if one seems agitated, especially a mother, actively give them space.
No photo is worth conflict with the animals you are there to adore!
5. Practice free diving

Being able to free swim to the bottom of the ocean floor and hold yourself there will improve your underwater photo opportunities significantly.
Many animals will hang out near the floor where the food is. If you can manage to swim down to meet them at eye level and shrink the physical distance between you, your photos will be substantially better.
The best way to practice free diving is by trying to sit on your butt for as long as you can in a pool. This will teach you how to balance holding and releasing breath.
The trick is to exhale slowly enough to prevent you from floating back up to the surface while holding enough oxygen to stay under.
Bonus: Don’t use your phone!

This is more of a travel tip than a photography tip, but is too important not to mention.
Even if your phone is waterproof, you absolutely do not want to rely on it as an underwater camera. All it takes is one slightly loose seal and the salt water will get through, absolutely destroying your phone.
If your phone becomes corrupted by salt water, you will lose everything you have stored and be without it for the remainder of your trip.
If you do not have an underwater camera, buy a GoPro. They are affordable, easy to use, and well-designed for underwater purposes.
🦭 Galapagos Wildlife Photography Locations
Galapagos Islands Map
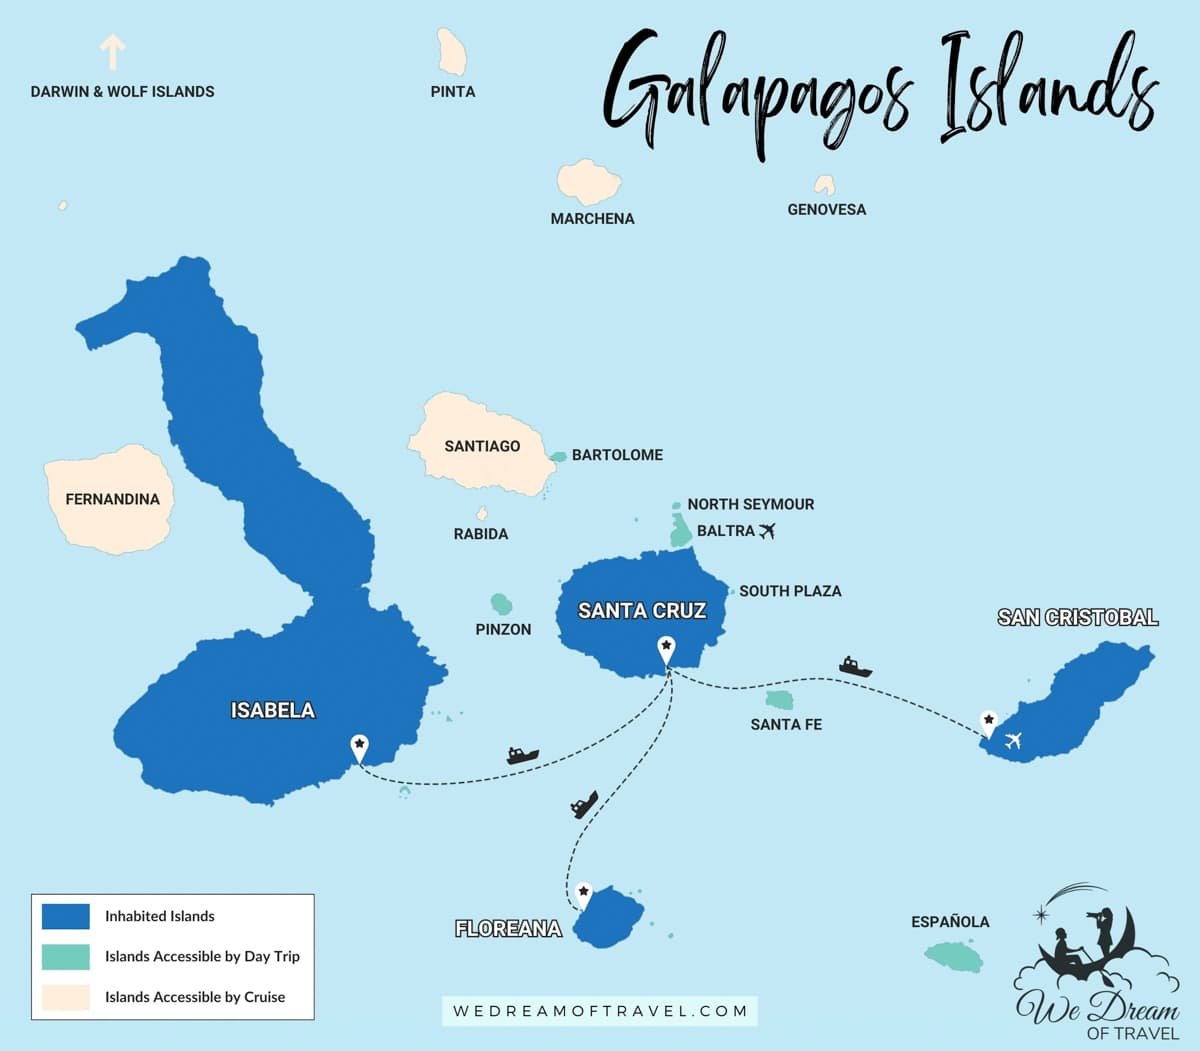
The map of the Galapagos Islands above shows the archipelago in its entirety and will, hopefully, help you better understand the layout of the islands as we discuss Galapagos photography locations.
It has been color-coded to indicate the islands that are inhabited and can be stayed on, those accessible by day tour, and those that are accessible via cruise ship only.
Understand that there are three inhabited islands within the Galapagos archipelago that you can stay on. In order of population and popularity, they are Santa Cruz, San Cristobal, and Isabela.
(Technically Floreana is also inhabited and allows overnight stays, but this is not a viable vacation option for anyone but backpackers nor is it somewhere you can take day trips from).
🏝️ DISCOVER MORE:
BEST ISLANDS IN THE GALAPAGOS TO VISIT
Galapagos Giant Tortoises

Best Places: Santa Cruz, San Cristobal
These are the animals that Galapagos owes its name to, translating to “tortoise” in English. They are also the most iconic, but sadly among the most endangered animal in the region.
Each island has its own unique species of giant tortoise! In fact, a trained eye can tell which island a tortoise is from just by looking at them.
The best place to see them in a natural habitat is El Chato Ranch on Santa Cruz.
You can also see them at Charles Darwin Research Station (Santa Cruz), Galapaguera de Cerro Colorado (San Cristobal), and Arnaldo Tupiza Tortoise Breeding Center (Isabela).
Sea Lions

Best Places: San Cristobal
Sea lions are the one wildlife encounter you can guarantee. They are incredibly playful and curious, and live on every island.
While you will encounter them throughout your time in Galapagos, San Cristobal is the best place to see them.
They are literally on every beach and pier in town and have completely taken over Playa de los Marinos.
We found Playa Mann to be the best beach in San Cristobal for swimming with sea lions.
Galapagos Penguins

Best Places: Bartolome, Isabela
The incredible Galapagos penguin is the only penguin species in the world found in a warm climate and in the northern hemisphere.
Though endangered, these cute little birds can semi-reliably be seen on several islands where they have established nesting colonies.
A day tour to Bartolome Island is the best bet, followed by Tintoreras or Los Tuneles on Isabela Island.
Our penguin encounter on Bartolome Island was an absolute highlight of our most recent visit and swimming with them is something we’ll never forget!
Marine Iguanas

Best Places: Santa Cruz, Isabela
The marine iguana is notable as the only species of iguana on earth that can swim and even feed underwater.
This unique evolution is a nearly miraculous demonstration of life’s ability to adapt and survive.
Much like sea lions, you are basically guaranteed to see marine iguanas on any island.
They are a bit more scarce on San Cristobal, but absolutely everywhere on Isabela and Santa Cruz.
Blue Footed Boobies

Best Places: Los Tuneles tour (Isabela), North Seymour, Española
The flamboyant blue-footed booby has become the unofficial mascot of Galapagos and is a genuine crowd favorite.
With their azure accessories and demonstrative mating rituals, they always entertain!
You will see blue-footed boobies in a dozen locations in Galapagos, but the best places to get up close and personal is by taking the Los Tuneles day tour from Isabela island.
There are also large colonies on North Seymour and Española islands.
Land Iguanas

Best Places: Baltra, Santa Fe, South Plaza
While Galapagos is known for the evolutionarily extraordinary marine iguanas, the colorful land iguanas still make for an impressive sight as well.
Look out for them if/when you arrive and depart from the Baltra airport as we saw several while waiting for our flight right outside the doors!
Galapagos Hammerheads

Best Places: Kicker Rock (San Cristobal), Gordon Rocks (Santa Cruz)
Watching an underwater cyclone of hammerhead sharks circling en masse is one of the most surreal experiences you will ever have observing wildlife.
Kicker Rock off of San Cristobal is by far the best place to see them, and tours can be done as a snorkel or dive trip.
Gordon Rocks off of Santa Cruz is the other location with a high probability of spotting them, but can only be done as a scuba dive.
Galapagos Sharks

Best Places: Pinzon Island, Santa Cruz
Don’t worry, they’re harmless (to humans, anyway)!
The Galapagos shark is another species found only in the region. They are fairly small but still very impressive.
The best place to truly see them is on a snorkel tour to Isla Pinzon, which has the one of the highest shark populations and perhaps the clearest water you will snorkel in Galapagos.
Magnificent & Great Frigate Birds

Best Places: North Seymour Island
Known as the pirates of the sky, the magnificent and great frigate birds can be easily identified in the sky by their unique M shape.
Seeing them soaring overhead will be a near-constant on nearly every island you will visit in Galapagos, but most people are more interested in seeing the hilarious mating display of the males wherein they inflate a bright red pouch on their neck to impress their match.
The best chance you have at observing this behavior is at North Seymour Island just north of Santa Cruz.
Red Footed Boobies

Best Places: Genovesa, Punta Pitt (San Cristobal)
There are actually three species of booby that inhabit the Galapagos islands.
Though their blue-footed relatives get all the attention, the red-footed booby is quite spectacular as well.
Like most aviary species on Galapagos, you may see the red-footed booby in dozens of places. However, the largest colony can be found on Genovesa island.
There is also a smaller colony at Punta Pitt on San Cristobal.
Sea Turtles

Best Places: Isabela, San Cristobal
Four species of sea turtles frequent the Galapagos islands.
Green sea turtles are by far the most populous and common to see and are also the only sea turtles to nest in the Galapagos.
It is also possible to spot the occasional hawksbill, leatherback, and olive ridley turtle.
You may encounter green sea turtles snorkeling anywhere in Galapagos, or by just looking off the main pier of Puerto Ayora on Santa Cruz.
However, the best place to truly experience their majesty is with a snorkel tour to Los Tuneles on Isabela or at Rosa Blanca on the 360° Tour from San Cristobal.
Eagle Rays

Best Places: Elizabeth Bay (Isabela), Black Turtle Cove (Santa Cruz)
If you have never swam with rays before, their grace in the water is genuinely transcendent.
Eagle rays are especially beautiful with their unique spotted patterns.
They can be found in Elizabeth Bay on Isabela and are often found at Black Turtle Cove (Caleta Tortuga Negra), on Santa Cruz.
However, they can be seen throughout the Galapagos.
When we visited, we spotted them off the pier in Puerto Ayora and swam with a large group in Concha de Perla on Isabela.
Dolphins & Whales

Best Places: Bolivar Channel (between Isabela and Fernandina)
The Galapagos islands are home to over 24 species of dolphins and whales.
Some species live here year-round, making sightings possible year-round.
However, you have the best chance to spot dolphins and whales between June and October when large numbers of migratory species are also present.
The most common place to spot them is the Bolivar Channel where the seas are cold and rich in nutrients and schools of fish.
Sea Horses

Best Places: Los Tuneles on Isabela Island
You will need a guide to find these adorable underwater creatures and will need some serious free-diving skills to get low enough to photograph them.
📷 Our Galapagos Photography Equipment
As it is such a common point of interest, we will begin with a list of the equipment we used (and did NOT use) on our 2023 trip to photograph the Galapagos islands.
Do not be dismayed if you do not have anything as high-end as what we use – you do not need professional equipment to come home with amazing photos from the Galapagos.
Most-Used Equipment
Camera: Sony a7riii

We use the Sony a7riii and have been in love with it ever since the first photo we took with it.
However, if you are going to pack a high-end camera or even entry-level DSLR, we recommend ensuring you understand how to use the settings before visiting Galapagos. The better the camera, the more mistakes are likely to show.
Lenses: Sony 24-105mm and Tamron 100-500mm

The Sony 24-105mm is our go-to travel lens, and photographing the Galapagos was no exception. This range is perfect for everything from portraits to landscapes, eliminating the need to change lenses in field.
We also made good use of our Tamron 100-500mm lens. While much of the Galapagos wildlife was close to us, there were plenty of occasions that having the extra zoom allowed us to capture birds in flight or animals a little further afield.
Underwater: GoPro Hero 11

The GoPro was a surprising hero (no pun intended) for underwater video and, yes, photography in Galapagos.
While we also have a proper camera with underwater housing, the miss rate was too high to be reliable due to the amount of debris and particles in the water.
With the GoPro recording at maximum resolution, we were able to take advantage of its incredible stabilization and focus accuracy to pull our favorite frames from videos and use them as photos.
Filters: Circular Polarizer (CPL)

Only one filter was worth bringing to the Galapagos, and that was a Circular Polarizer that basically lived on the front of our 24-105mm lens most of the time.
If you have not used a CPL, they eliminate glare and enhance colors, particularly with overhead light.
These are essential for tropical settings as they bring out the color and clarity in the sky and ocean water.
Least-Used Equipment
This is all the camera gear that we brought with us but did not get as much use out of as we would have liked. Most of it never got used even once and should have been left at home.
Underwater: Sony RX100 VII with Dive Housing
We typically use a Sony RX100 vii with underwater housing to capture high-quality underwater images. Unfortunately, it did not serve us as well in the Galapagos as other destinations.
The biggest issue we had with this was that the Galapagos ocean water is often cloudy and full of particles due to the Humboldt and Panama currents. This cloudy water made our auto-focus hit rate abysmal.
Also, the animals often came too close to us or were moving too quickly for the 24mm; the wide angle of the GoPro was much better.
Drone: DJI Mavic
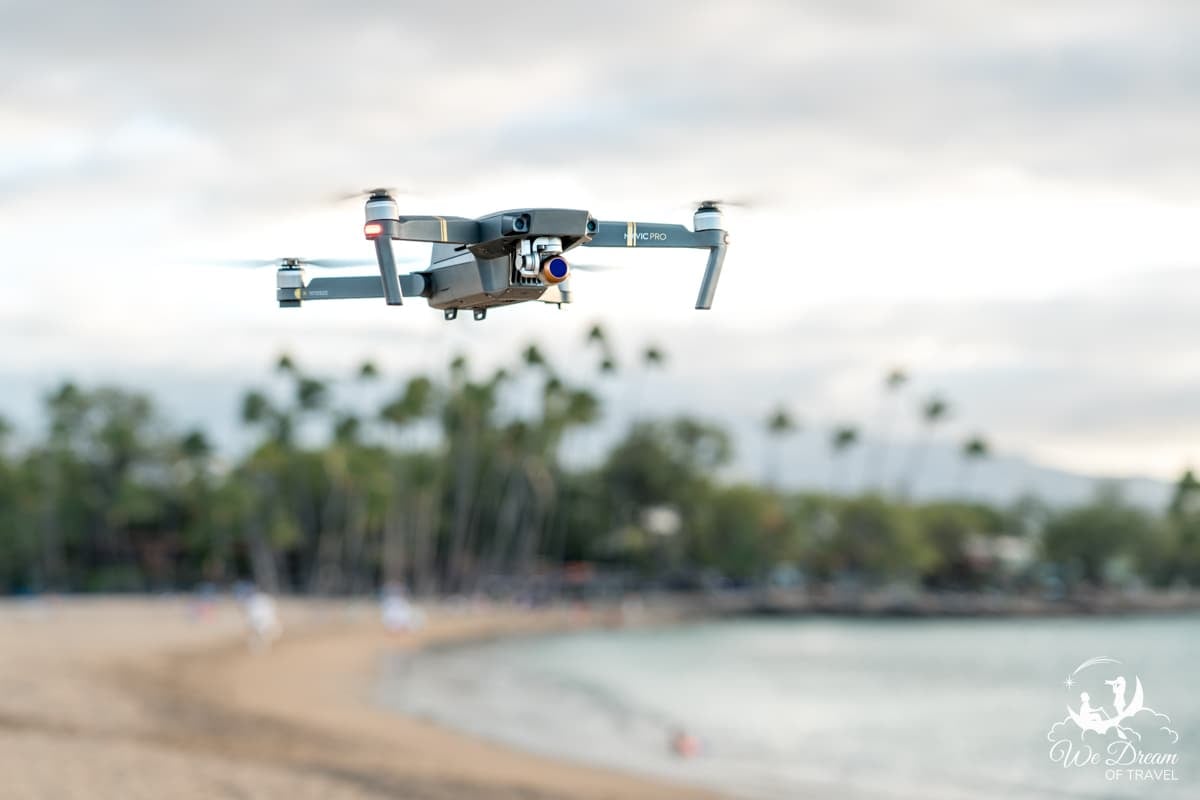
While we absolutely love drone photography, especially in tropical settings, you should leave it at home.
Drones are not allowed in Galapagos without a special filming permit which is not easy to come by.
We did get some use out of our DJI Mavic Drone during our time on mainland Ecuador, but not enough to justify bringing it.
Filters: ND, Graduated

There is very little point in bringing an ND filter to the Galapagos as a surprising amount of your photos will be taken in the daytime.
Beyond that, modern editing software makes it easy to simulate an ND filter.
🧳 FIND OUT MORE:
PACKING LIST FOR GALAPAGOS + FREE PRINTABLE CHECKLIST
🙋🏽♀️ FAQs About Photography in the Galapagos

Hopefully, we have covered most of these throughout this guide, but this section covers some of the most frequently asked questions first-time visitors have about Galapagos photography.
Simply click the drop-down arrows to reveal answers to the questions below.
What equipment do I need for Galapagos photography?
You will want to bring one telephoto zoom lens for wildlife and one versatile wide-angle lens for landscapes when photographing the Galapagos islands.
Additionally, be sure to bring a CPL (circular polarizing lens) to reduce glare from the ocean and accentuate colors, and a waterproof camera for underwater encounters.
What is the best camera for Galapagos photography?
When photographing the Galapagos islands specifically, you will want to bring an underwater camera as well as something for standard shooting. If you are not a highly experienced underwater photographer, a GoPro is surprisingly the best option due to its amazing stabilization, auto-focus, and ease of use.
You will find shooting videos and grabbing single frames a surprisingly effective option for collecting underwater photos of wildlife encounters in Galapagos.
Do you need a tour or permit to photograph Galapagos?
While a Galapagos photography tour comes with many advantages, it is absolutely not required! Anyone is free to visit the Galapagos islands without a guide, tour, or permit! However, you will need to book tours with a naturalist guide to some parts of the islands.
📚 More Galapagos Islands Travel Guides


The two of us work very hard to create these free travel guides to help you plan your dream vacation. If you think we’ve done a good job and would like to say thanks, please consider clicking the donate button below 🙂
Hopefully, this guide has answered all of your questions, now it’s time for the rest of your planning!
These guides will help you through the process step-by-step, providing insight on everything from finding flights to top activities and so much more.
Planning Guides
- Where to Stay in Galapagos
- How to Travel to Galapagos in 10 Easy Steps
- Galapagos 5-Day Itinerary
- Galapagos 7-Day Itinerary
- Galapagos 10-Day Itinerary
- Best Time to Visit the Galapagos Islands
- How to Island Hop the Galapagos
- Galapagos Packing List
- Galapagos Trip Cost & How to Budget
- How to Visit the Galapagos on a Budget
Local Guides
- Santa Cruz Island Ultimate Guide
- San Cristobal Ultimate Guide
- Isabela Island Ultimate Guide
- Bartolome Island Ultimate Guide
- Pinzon Island Ultimate Guide
Things to Do Guides
- Top 50 Things to Do in Galapagos
- Best Islands to Visit in the Galapagos
- Best Galapagos Day Tours
- Galapagos Photography Guide
- Best Beaches in the Galapagos Islands
- Why You NEED to Visit the Galapagos Islands
- Best Galapagos Snorkeling Spots
- Iconic Galapagos Animals & Where to See Them
💭 Final Thoughts

The two of us work very hard to create these free travel guides to help you plan your dream vacation. If you think we’ve done a good job and would like to say thanks, please consider clicking the donate button below 🙂
We truly hope you have found this guide on Galapagos photography useful, inspiring, and actionable as you prepare for the Ecuadorian trip of a lifetime!
Now we’d like to hear from YOU!
Was there any information you thought was confusing, missing, inaccurate, or simply outdated?
Or perhaps this was incredibly helpful and you just want to inflate the egos of your authors?
Regardless, we’d like to know! Help us to help future readers by sharing your thoughts in the comments below.
📍 Enjoyed this Galapagos Photography guide? Pin it! 🙂


