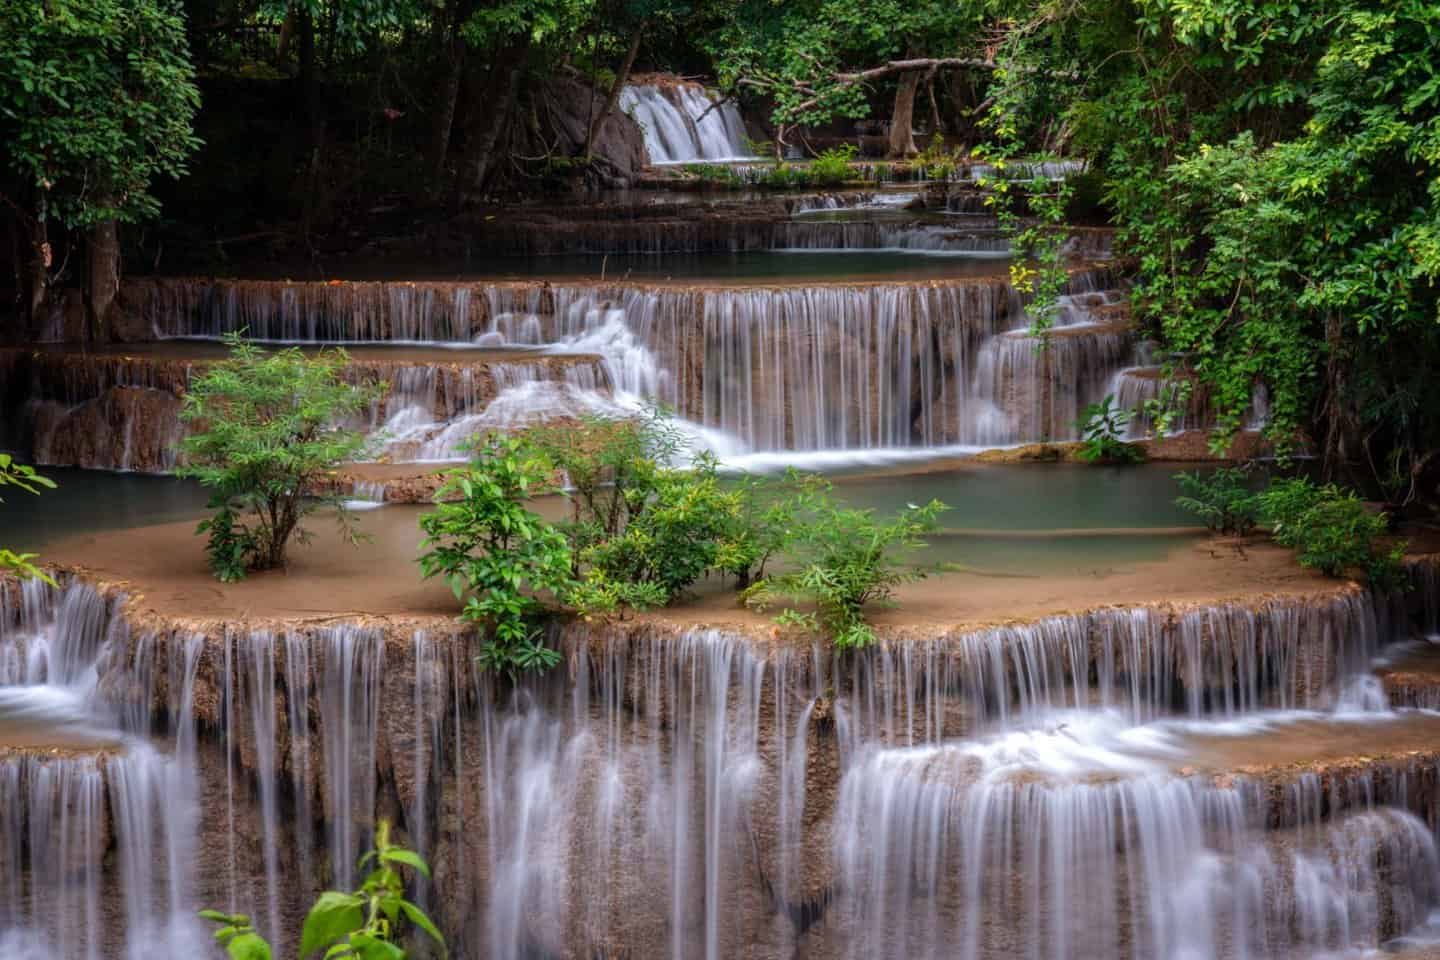
One of the major reasons I got my first DSLR camera was that I wanted to learn how to photograph waterfalls with soft, flowing water like I saw on social media.
I eventually learned this was achieved with “long exposure waterfall photography,” but I still didn’t know what that meant.
You are likely here because you are currently where I was then! Or maybe you’re already shooting with long shutter speeds but not achieving the results you are after.
Either way, you are in good hands! By the end of this long exposure waterfall photography guide, you will be able to capture stunning waterfall photos regardless of your current skill level.
Advanced photographers will also be introduced to some techniques for cleaning up spray and motion blur that will be essential in perfecting your photos.

Shutter Speed & Long Exposure Photography Explained
Before we get into the hands-on learning, I think it helps to conceptualize in general terms what we are hoping to achieve. Advanced photographers can skip this section.
If you are a beginner and do not understand shutter speed yet, that’s completely ok! I cannot encourage you enough to first consult this guide to understanding shutter speed and long exposure photography.
I promise you that by the end, you will have taken a significant leap in your understanding of photography and be much more prepared for what is to come in this guide.
In terms of our camera, shutter speed is how long the shutter remains open accumulating light. In terms of our PHOTOS, however, shutter speed determines how much motion we capture.
With waterfall photography, to capture the soft, streaming effect of moving water, we want to leave that shutter open for as long as possible. In other words, we generally want a long enough shutter speed to show the motion of the water.


As a general rule, I try to shoot most waterfalls at an absolute minimum of half a second. However, I tend to try for as long as possible up to 30 seconds in most situations.
Equipment for Long Exposure Waterfall Photography
Disclosure: At no cost to you, we receive a small amount for any purchases made using the links below.
So now that you understand our goal, hopefully, you understand why we may need some tools to help! These items are essential for photographing waterfalls with a long exposure.

Tripod
If you are capturing long exposure waterfall photos, you absolutely need a tripod! If there is wind, which is often the case near waterfalls, you will need a sturdy one. The tripod allows your camera to stay completely still for the duration of your photo.
With a shutter speed of at least a few seconds, it is impossible to hand-hold a camera without having soft edges from your natural handshake.
If you are new to photography, start with something cheap that comes with a hook that you can fix more weight to. The annoying thing about tripods is that weight = stability, but no one wants to carry a lot of extra weight. Many will include a hook so you can fix a backpack or something heavy to it for this purpose.
This Amazon basic tripod is a good starter tripod. It is easy to use and has everything you need at a minimal investment.
It will break, I can almost promise you that, but it will hopefully last you long enough so that when you are ready to invest more money, you have a better idea of your personal needs from a tripod.
Circular Polarizing Filter aka CPL

Ok, this is not exactly essential, but it’s close, and the filter I use most often in landscape photography. CPL stands for Circular Polarizer, and what it does is remove the glare from reflective surfaces such as water or even wet leaves.
You will find the color is greatly enhanced in your photos with a polarizer because the white glare from the bright sky is removed, even on cloudy days. It also darkens the scene a bit, allowing you a slightly longer shutter speed!
I personally love my PolarPro Quartzline filters, but I recommend upgrading to these rather than learning with them. Of course, if you have the money to invest in the best right from the start, these are it!
If you are just learning and want something affordable, consider this starter bundle. Although, not the best quality, it will allow you to learn the ropes and work well enough.

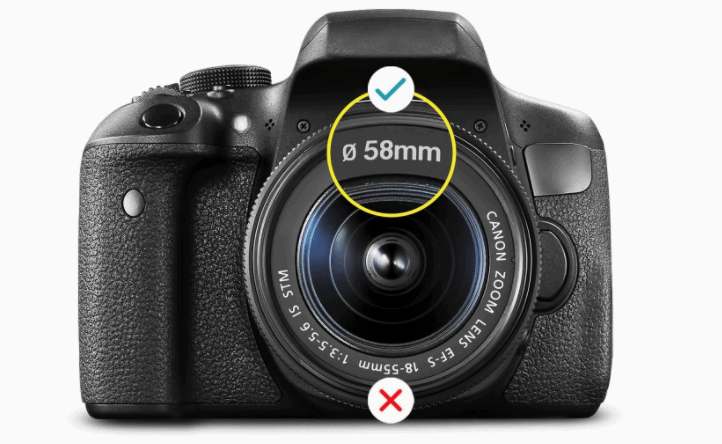
IT IS IMPORTANT THAT YOU GET THE RIGHT SIZE FOR YOUR LENS!! Each lens has a “thread size” that you can find by looking at the front of it, or by Googling it. Most kit lenses are 58mm Thread Size, which is what we have linked to.
Neutral Density (ND) Filter

An ND filter is similar to the CPL above in that it is like sunglasses for your lens. An ND filter reduces the amount of light that gets through your lens, allowing longer shutter speeds.
They are essential for long-exposure waterfall photography during daylight hours when too much ambient light exists.
The ND filters I use also have polarizing abilities. This means I can cut the glare from the water, enhance my colors, and extend my shutter all at once. As with anything in photography, these high-quality glasses cost a bit more.
If you have the money to invest, I recommend getting a 10-Stop ND/CP from PolarPro. If you are just starting out, go with the Filter Starter Bundle we mentioned above. Again, make sure you select the right filter size for your lens!


Microfiber Cleaning Cloths
You always want to make sure you are carrying plenty of clean microfiber cloths to make sure your lens is clean. Do not use your shirt, especially with starter lenses, as the glass will get scratched.
When doing long exposure waterfall photography, it is a good idea to pack a lot of extras. You will often find the spray from the waterfall landing on your lens and will need to keep it wiped clean as best you can between shots. They are cheap and a good idea to have more than you think you’ll need as they tend to get lost or left in pockets.
You can find a very well-priced eight pack here.
Remote
This is by no means essential, but it is worth considering a remote whenever shooting long exposure photography. Having a remote will allow you to take exposures longer than 30 seconds at a time. I
t will also prevent you from disturbing the camera by pushing the shutter button to begin shooting.
Some remotes are also intervalometers, which will also allow you to do time-lapse photography if you are interested.
If you do not have a remote, you will simply need to set your camera to run on a 2-second timer. This will prevent shake from ruining your photo when you push the shutter button to take a photo.
YOU MAY ALSO ENJOY:
The Best Camera Gear for Travel Photography
How to Compose your Waterfall Photos

The first thing you will want to consider is your image orientation, meaning landscape/portrait mode in photography terms, or horizontal/vertical in layman’s terms.
There are no rules for landscape or waterfall photography, only guidelines. But most of the time, you will want to compose your photo according to the orientation of the waterfall itself.
In other words, if it’s a tall waterfall, you will likely compose it in a vertical (or portrait) format. If it is a wide waterfall, you will likely compose in a horizontal (or landscape) format.

There are exceptions for each guideline though. For example, if you want to include the sky because it is of interest (perhaps there are some beautiful sunset colors), then you may choose to shoot a wide waterfall in a vertical format.
Conversely, if a tall waterfall is surrounded by interesting scenery, you may choose to shoot it in landscape format.
My advice for composing a photo is always this: describe what you like about the scene as if you were explaining it to a person who is blind.
As best you can, try to fit those elements into your frame. If you are shooting on a grey, boring day, you probably wouldn’t even mention the sky.
Accordingly, there is no reason to include much of it in your photo!
YOU MAY ALSO ENJOY:
15 STUNNING Waterfalls in Oregon
Waterfall Photography Tips For Beginners
Below are a few basic tips for photographing waterfalls designed for beginners. Advanced users will find more interesting ideas in the next section.
Settings
You will want to have your shutter open as long as possible. This means you are trying to get the slowest possible shutter speed. Again, you may need to consult our guide to understanding shutter speed if you do not yet know what this means.
To get a slow shutter, you will usually want the smallest aperture possible, which tends to cap out around F22. If you are using an ND filter, you may actually need a wide-open aperture such as F4 or F5.6 depending on the strength of the filter.
You will also want your ISO to be the minimum. This is usually 100 but some cameras may offer as low or as 50 (and Fuji users cannot go lower than 200).
Aperture Priority
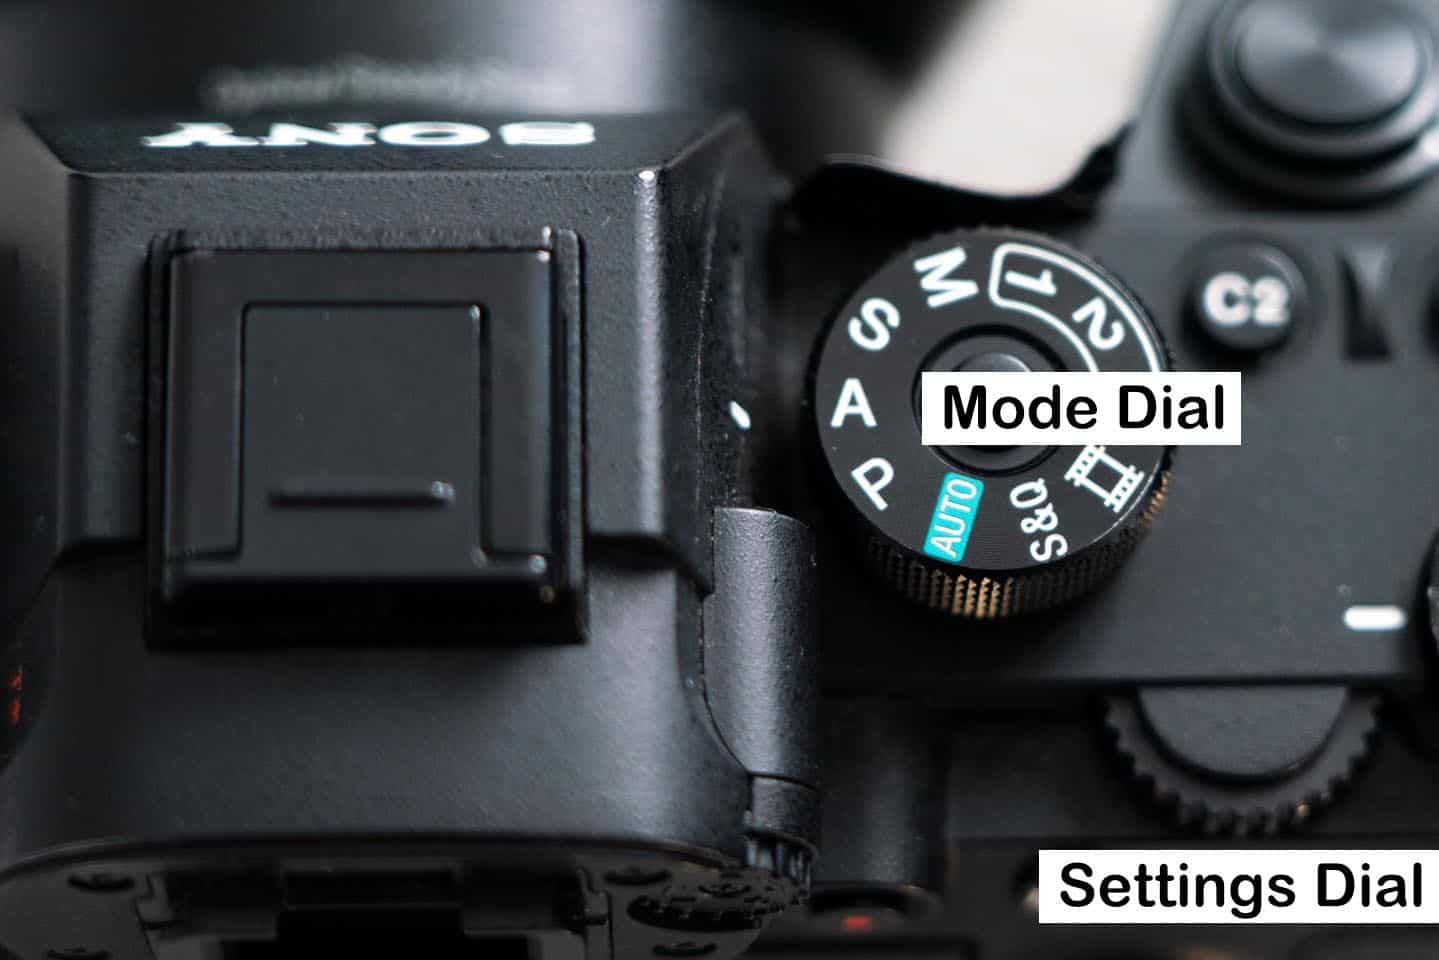
If you are not comfortable shooting in Manual Mode, set your camera to “Aperture Priority Mode”. This setting is usually indicated by an A (but Canon users will find it indicated by Av).

Once in aperture priority mode, rotate the Settings Dial until your f-number is as large a number as possible (e.g. f22). Your ISO must be as small as possible still. In Aperture mode, the camera will automatically pick the correct corresponding shutter speed for you, which will be the slowest possible.
If your images are coming out too bright or too dark, you may have to adjust your exposure settings. Unfortunately, that is controlled in different places on each camera so you will have to turn to YouTube for your particular model.
2-second timer
If you are not using a remote, be sure to set your Drive Mode (aka Shutter Mode) to a 2-second timer.
If you do not have a timer set, the camera will move when you press and release the button to begin taking the photo. Although this movement is small, it will create a soft image in your long exposure.
With a 2-second timer, press the shutter lightly and everything should be stable by the time the camera begins firing. This is extremely important!
Again, you may need to consult YouTube to learn how to set this for your exact camera.
READ MORE:
Best travel lenses for Sony a7iii and other Sony Alpha cameras
Long Exposure Waterfall Photography Tips For Advanced Photographers

Some of you may be well past everything else in this guide, but I’ve got a few helpful tips for those of you who are capable of using Photoshop to layer your images.
Exposure Blending to Control Highlights
If you are attempting long exposure waterfall photography during daylight, you may find that your scene is well-exposed, but the highlights of the waterfall itself (or where it makes contact at the base) are blowing out.
To combat this, we can do a pretty simple “exposure blend” using Photoshop. Essentially, you will take one shot with the overall scene well exposed, and one shot with the waterfall well exposed. Of course, both must be taken on a tripod without moving it between shots.
When you get these two photos home, you can open them as two layers in Photoshop. From here, create a mask to include the waterfall from one exposure to replace the version that was blowing out.
Shutter Speed Blending for Wind
We are going to use the same principle to account for unwanted motion blur in our scene due to wind. Take the first photo with your shutter speed nice and slow, noting the exact exposure value you are shooting with.
Once you have that shot, take another one shooting the same exposure value but at a very fast shutter speed. You can then use these two images to stack in Photoshop.
Use layers and masking to add the soft, flowing water from your long exposure into the sharp, fast shutter version of your scene. This will eliminate motion blur in surrounding foliage.
An easy way to ensure you have a consistent exposure value is to shoot in Aperture Priority mode. Simply shoot one shot at your highest possible F-stop and the other at your lowest possible f-stop.
Blending to Remove Water Droplets
Layers and masking can also be used to deal with water droplets if there is a lot of spray coming off the waterfall. Take the same shot with the same settings several times, wiping down the lens between each shot.
In Photoshop, you can layer all of these on top of each other. From here, blend through the areas that have droplets in one shot down to the layer below.
FIND THE PERFECT CAPTION FOR YOUR PHOTO:
Best Waterfall Quotes for Instagram
Final Thoughts

Depending on your skill level, this may have felt like a lot to remember! Don’t worry, we all learn these things the same way; by practising! So print this out or save it on your phone and plan a day of shooting waterfalls! By the end, hopefully, you will have the knack for it.
If you are not yet comfortable with shutter speeds, I cannot recommend putting some time aside to read our guide to long exposure photography first. This will walk you through the concept and execution in a way that is non-technical and non-intimidating.
For more information on all the camera equipment we use, check out our guide to camera gear for travel photographers.
As always, please share your thoughts, questions, and concerns in the comments below!
For some waterfall photography inspiration, you may enjoy these guides to our favourite waterfalls we’ve visited around the world:
- Huay Mae Khamin Waterfall (A Hidden Gem in Thailand)
- Kuang Si Falls in Laos
- Top 15 Waterfalls in Oregon
- Best Waterfalls near Cairns Australia
Enjoyed this Guide to Long Exposure Waterfall Photography? Pin It! 🙂


I am already really excited for shooting the long expo waterfall for the first time soon. Its been long that I have been learning and gathering knowldege on the waterfalls and long expo, I would be spending majority of my time doing that. The images here makes me more tempted towards it.
That is so great to hear!! I hope it goes well for you and dont be frustrated if it takes a couple attempts 🙂
I am going to visit Yosemite National Park in a few weeks. Since I live in the Dallas-Ft. Worth area of Texas, there are no waterfalls to practice with in this area. My notes to review from your post will be SO helpful. I will be reading them every few days as my trip approaches and during the plane trip to Yosemite. I am very much an amateur in photography, but I am excited by the prospect of capturing some photos I will enjoy, thanks to your information.
Thanks so much for your comment, I’m so happy you’ve found the post useful. I had a thought you could possibly try at home, however, I can’t say I’ve tried it myself… you could try setting up your tripod in the bathroom and use the shower or slow running tap to replicate a waterfall… as I said, I’ve not tried it myself to know if it would work! However, I think the principle would be the same and may help you to visualise and understand the process a little more before you’re in the field. I hope you have the most amazing time in Yosemite, it’s such a spectacular place. We do also have a couple of Yosemite guides you may be interested in as you plan your trip: Yosemite Photography Guide and Yosemite Day Trip Itinerary.