

Shooting in low light is always tricky, but photographing aurora presents an even greater challenge; especially for beginners!
Because the stars move slowly, it is much easier to capture the milky way or photograph the night sky by following a settings “recipe”. Aurora photography, however, requires you to make adjustments on the go.
The amount of light available can change by the second, and you have to know how to react!
But fear not aspiring shutterbugs! This guide to aurora photography has been created to prepare you for one of nature’s greatest marvels and assumes only a basic understanding of photography.
In this guide to photographing aurora, I will explain everything you need to know to prepare for your first experience witnessing, and capturing, the southern or northern lights!
🇮🇸 GOING TO ICELAND? READ NEXT…
100 BEST PHOTOGRAPHY DESTINATIONS IN ICELAND
📸 Essential Equipment for Photographing Aurora
Disclosure: At no cost to you, we receive a small amount for any purchases made using the links below.
There are a few basic things that you will need for photographing aurora, but it is all gear that most of you should already have.
Camera (that allows manual settings)
I know this will seem obvious to some of you, but I suspect there are others who are hoping to capture some aurora photography from their phones or compact cameras.
If you get a truly incredible polar light show, you might be able to actually achieve this, but it is extremely unlikely to get anything usable without a camera that can shoot in Manual mode.
Many factors will determine the quality of your image, but any camera that can shoot in Manual can be used to photograph the aurora.
All the photos in this blog post were taken with the Sony a7riii.

Tripod
Having a good, sturdy tripod is extremely important for photographing aurora.
Your camera will need to remain completely still for anywhere between 5 and 30 seconds, potentially even minutes if you choose, and most places that provide opportunities for northern lights photography also tend to have challenging wind and weather.
Accordingly, a tripod is an absolute necessity, and one with a bit of weight is preferable.
Spare batteries
Battery capacity diminishes greatly in cold environments.
Assuming you are in the arctic north, temperatures will likely be low.
In addition, longer exposure times on your photos will exhaust the batteries quicker. Make sure you bring some spare batteries with you!
📸 READ MORE:
What equipment I use for my travel photography
Intervalometer
This is not necessary, but you may want to consider purchasing an intervalometer if your camera does not have one built-in. This will allow you to shoot time-lapse if you desire, or just keep the camera rolling while you enjoy the aurora with your eyes.
Intervalometers are also useful to avoid the camera shake that occurs when pressing the shutter button.
For those of you wondering what an intervalometer is, it is a device that plugs into your camera (or is often built into the camera firmware) that allows you to set incremental times for when the camera will fire.
For example, you could set it to shoot every 8 seconds for 450 images (aka “frames”).
450 frames x 8 second intervals = 3600 seconds (aka 60 minutes).
So, the intervalometer would fire every 8 seconds and would do so 450 times, meaning you could create a time-lapse that spans the course of one hour.
For reference, most videos are viewed at 30 frames per second. In the above example, 30 frames per second divided by 450 frames = a 15-second time-lapse video.
Photography Mittens
Yes, photography mittens! I was completely shocked by how quickly my hands would become unusable within seconds of being exposed to the icy winter winds in the arctic environments.
So why not just get big thick gloves? Because then you will not be able to manipulate your settings!
Buying a good pair of warm, wind proof, water-resistant gloves with retractable thumb and index fingers holes was one of the best purchases I made prior to our winter trip to Iceland.
⭐️ Pro tip: I found cheaper, better options by searching for ice fishing gloves than photography gloves.
🌌 Best Lens for Aurora Photography

When choosing the best lens for photographing aurora, there are two important considerations; focal length and maximum aperture.
Beginners: Read the next two paragraphs, which discuss these concepts.
Advanced: You many want to skip to the specific recommendations below.
Beginners Guide: the Best Lens for Photographing Aurora

What is focal length? Is wide angle better for photographing aurora?
“Focal length” refers to how much distance the lens covers.
Imagine a telephoto lens as a telescope, and a wide angle lens as a security camera.
Telephoto lenses capture subjects in the distance, whereas wide angles are better for capturing scenery, landscapes, and subjects near the camera.
Because we generally want to capture the scenery and sky, similar to the photos you see in this photography guide, most photographers will choose the widest angle they have available for photographing the aurora.
In the photo above, you can see my lens marked 15mm. Focal length is always measured in millimeters and 15 is one of the widest angle lenses available for Full Frame cameras.
Note: The 72mm marking denotes the “thread size” which indicates which size lens cap and/or filter I would need to properly attach to the front.
*For reference, the GoPro uses a super-wide-angle fixture, which some of you may be more familiar with.
What is aperture? What F-Stop do I need for photographing aurora?
If you go into your Manual settings, you will notice somewhere in the display the letter F with a number next to it (ie F3.5).
Without getting technical, this number refers to how much light your lens is allowing in, with low numbers letting in more light than high numbers. Anything F2.8 or less is considered “fast”, and lenses with maximum aperture F2.8 or less is often called “fast glass.”
“Maximum aperture” refers to the LOWEST F-STOP the lens will allow.
Because we are shooting at night, we do not have much light available to work with. Accordingly, we need to let in as much as we can!
If you use a Canon or Nikon starter bundle, such as the Canon Rebel series, you likely received an 18-55mm kit lens with your bundle. If you haven’t purchased anything else, this will be the lens you want to use. If you have anything that is a wider angle (anything from 10-18mm), you will likely want to use that.
If you are looking to buy a lens specifically for photographing aurora, read the next section!

Advanced Guide: the Best Lens for Photographing Aurora
There are a myriad of lenses to choose from depending on which camera make and model you use.
If available, I strongly recommend something F2.8 or faster, and at least 24mm wide on a crop sensor or 35mm for full-frame (though I tend to shoot much wider.)
Personally, my favorite focal distance for aurora photography is between 14-24mm on a full frame, or 10-18 on a APS-C crop sensor camera.
For crop sensor users, I would recommend the 14mm F2.8 lens made by Rokinon/Samyang (same company, but different names in different regions). This lens is not one you will use often outside of night photography, but it is available for a low price point and will be a big improvement for photographing aurora over the kit lenses that came with your camera.
If you use a full-frame camera, my favorite lenses for night sky and aurora photography are as follows:
Laowa 15mm F2: The lens I use with my Sony A7Riii. It’s affordable, fast, small, super-wide, and a great overall lens for night sky and aurora photography.
Sigma 14mm f/1.8: The widest lens available at F1.8, and considered the best lens for Milky Way and astrophotography. Of course, it is also the most expensive by far. As it is literally twice the price of the Laowa mentioned above, the decision I had to make at the time of purchase was, “is this lens TWICE as good?” For my purposes, the answer was ‘no’, but it is absolutely a premier lens and a great option for those who can afford it.
Sigma 20mm f/1.4: You give up a lot in focal length compared to the 15mm, but 20mm is still plenty wide enough for most landscapes. Going from F2 to F1.4 may not sound like a big improvement, but it will make a big difference in keeping your ISO low. Were this option available at the time when I purchased the Laowa, I may have gone this route… I don’t think there is a wrong answer between the two.
16-35mm f/2.8: Every brand makes its version of this lens, and it is the preferred lens for most landscape photographers. Personally, I find F2.8 just a bit slower than I like for astrophotography. More importantly, the price tag at $2000+is well above what I would be willing to pay for one lens based on what I like to shoot. All of that said, there is no debating this is a good quality all-around lens that will likely become your workhorse for daytime AND night photography.
Sigma 14-24mm f/2.8: Again, a bit too slow to buy as just a night lens, but is perhaps the best option for landscape photographers who want a workhorse lens for both day and nighttime imagery in one. As it is significantly less expensive than the name-brand 16-35mm lenses mentioned above, it is worth considering if you are only looking to invest in one piece of glass to do it all.
📷 READ MORE:
Best travel lenses for Sony Alpha
🌧️ Environmental Factors When Photographing Aurora

During my visit to Iceland, which was a dream destination of mine and my first aurora-chasing voyage, I just assumed the key to photographing aurora was getting lucky and being ready… well, that was HALF right.
Of course, you’re going to want to be in one of the best places to see the northern lights, but you’ll also need to be ready, lucky and proactive!
Whether or not you are able to see and photograph the aurora depends on 4 important environmental factors:
- Solar Activity
- Lunar light (moonlight)
- Light Pollution
- Clouds
☁️ Cloud Cover: Weather Forecasts
First and foremost, you need to try and be in places without cloud cover!
Predicting this can obviously be very tricky, especially in places like Iceland where the clouds can roll in and out by the moment.
You should make studying regional weather maps a priority in order to determine the areas that are most likely to have clear skies for extended periods each night.
Of course, many of you will not have the flexibility of schedule for this. In that case, you should at least check the nightly forecasts to see if there are times when the clouds are expected to break.
If nothing else, just go for a drive and don’t stop until you find clear skies!
One thing is for sure – you can never photograph the aurora if you can’t see the sky!
☀️ Solar Activity: Aurora Photography Forecasts

What I did not realize until my first visit to photograph the aurora was how much the magnitude of the dancing lights can vary.
Sometimes, it looks like nothing more than a milky white cloud to the naked eye, but low and behold, that’s actually a weak aurora!
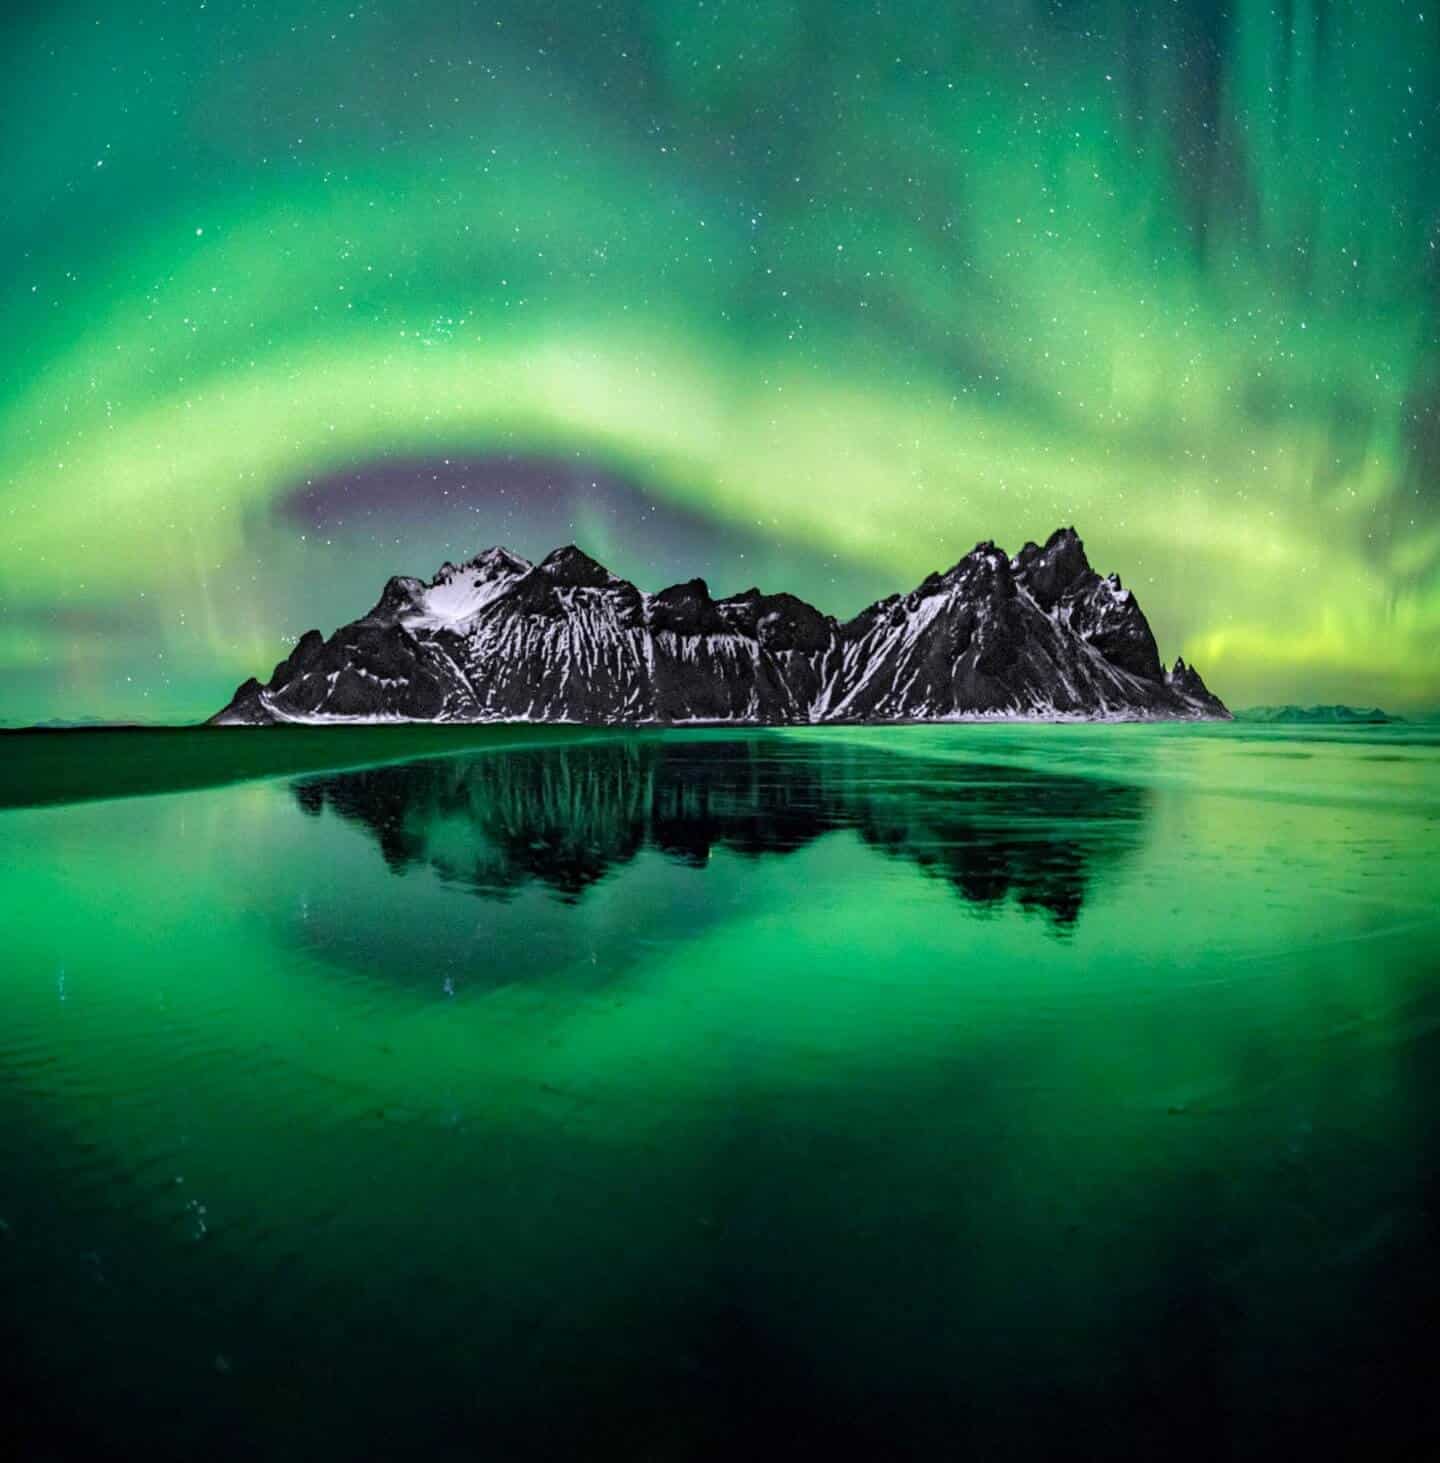
During our 30 days in Iceland, this is all we got most nights. Occasionally, a thin, passing wave would flow through without color visible to the eye, but the camera will pick it up.
Other times, however, the entire scene is suddenly illuminated by bright green light as multicolored bands dance and swirl in the sky above. The depth of color and motion is determined by solar activity, which is rated by a “KP Index.” A KP1 is very weak, while a KP10 is unheard of. Unfortunately, this solar activity is only somewhat predictable.
Depending on where you will be, many countries offer weather services and apps that predict solar activity.
Iceland, for example, has the “My Aurora Forecast” app that will send you notifications for a spike in solar activity. In addition, there are Facebook groups dedicated to aurora alerts that can be very valuable.
🌗 Moonlight – Lunar Phase
While a big moon poses a problem for astrophotography, it can actually be a huge blessing for polar light and aurora photography!
When shooting with a bright moon, your camera is actually able to capture a lot more light than your eyes will observe, allowing you to have clear details in your foreground.
If shooting without lunar light, however, you may not be able to get much more than silhouettes and shadows.
My favorite aurora photos came from nights with a bright moon that provided plenty of light for my foreground, including the shot below of the seldom-seen Aurora Australis (Southern Lights).
This was shot in New Zealand in 2018 on a full moon; notice how the moon is even bright enough to cast a shadow and illuminate the golden-sand beach!

💡 Light pollution
Again, all of photography comes down to your ability to capture light.
When photographing night skies, ambient light poses a big problem, especially city light. It will affect your ability to detect the aurora amongst the glow, hide stars, and otherwise reduce the visibility of the sky.
As much as possible, try to find locations that are far from large cities or unnatural light sources!
📷 Camera Settings for Photographing Aurora

All of the factors discussed above influence the amount of light available, and will, therefore, affect the settings you will want to dial in on your camera.
Because there is so much to consider, following a “settings recipe” is much trickier than some of you will be comfortable with.
Still, I understand many of you are not trying to learn the entire art of photography, but simply want to capture the aurora on your once in a lifetime holiday. If this is you, read the Beginner Camera Settings section below and print this guide, if necessary.
If you already understand the exposure triangle (Aperture / Shutter Speed / ISO), you can skip to the more technical Advanced Camera Settings section below for photographing aurora.
Beginner Camera Settings for Aurora Photography

It is vital that you know how to set the F-Stop (aperture), shutter speed, and ISO on your camera. Even if you don’t fully understand what these do, you should make sure you know HOW to set them prior to your trip.
Begin with your camera settings as follows:
- Aperture: Maximum (displays as F1.8, F2.8, F3.5, etc.) The lower the number, the better (this varies from lens to lens).
- Shutter Speed: 15 seconds (displays as 15″)
- ISO: 1600
A brief, non-technical explanation of what you are achieving with these settings follows:
- Aperture: Allowing as much light to pass through the lens as possible.
- Shutter speed: By holding the shutter open for 15 seconds, we are allowing light to continue accumulating over a long period of time.
- ISO: By increasing our ISO, we are making our camera more sensitive to the limited light that is available at night.
The reason for setting our F-Stop to allow maximum light to enter should be pretty obvious, but why 15 seconds? Well, because there is not much light available at night, so you need to allow more time for it to accumulate.
So why not longer? If your 15-second exposure is too dark, you can certainly try a 20 or 30-second exposure!! However, stars are moving all the time, and longer shutter speeds begin to show what we call “star trailing”, where the stars form lines instead of dots.
In addition, if you are photographing aurora that is highly active, it will start to smear and lose detail the longer you leave the shutter open.
Adjusting Camera Settings
If the settings above do not provide a bright enough photo, the first thing I would suggest is increasing the ISO (higher number). Move it up in increments until the photo looks good!
The downside of photographing at a higher ISO is that the amount of “noise” (aka grain) will increase as well. While this is not ideal, I always tell my students that it is better to get a usable photo with a bit of noise than an unusably dark or blurry one!
In contrast, if the settings above are giving you an image that is too bright with your aurora “blowing out”, then you will most likely want to reduce the ISO (smaller number). This could happen on a night with a very bright moon or an incredibly strong aurora. Try ISO 800, then 400, etc, until the photo looks right.
You can also move your shutter speed down to 10 seconds, 8 seconds, etc, until it looks right. I found that with a very active aurora, 5-8 seconds worked great to let enough light in without smearing the dancing sky.
Advanced Camera Settings for Aurora Photography

For those of you reading this section, I will assume you already understand the exposure triangle and know how to shoot in a manual or semi-manual mode. So let’s talk about choosing the right settings, and how to react to the environmental factors listed above.
Aperture
You will want this to be at the maximum allowed. There may be a few examples, but they would be incredibly specific and impossible to cover here.
Shutter Speed
This is the tricky part in photographing aurora. There were nights when it barely moved at all, appearing more like a cloud than the northern lights. When there is little motion in the sky, you can get away with longer shutter speeds.
In fact, you may want to let it stay open longer to keep your ISO down and allow the motion of the slow-moving aurora to create more light in your sky.
In the case of low solar activity, I suggest holding the shutter open as long as you can without getting star trailing, which is usually about 10-20 seconds for wide angle lenses.
The extra benefit of this is that the slight motion in the aurora will make it look larger and more dramatic the longer you allow the shutter to remain open.
If you have high solar activity with a rapidly moving aurora, you will likely want to bring that shutter speed down to the 5-8 second range to capture its motion.
If you are alright with silhouetting your foreground and have a lot of movement in the sky, you may even go down as low as 2-4 seconds.

ISO
In my opinion, getting the shutter speed right for the scene should be your priority. Your aperture is already maxed out, meaning the exposure must be controlled with ISO and Shutter Speed.
If you have found your perfect shutter speed (based on the movement of the aurora) but your exposure is too dark, you should increase your ISO to compensate.
The reason I suggest this is because there are ways to deal with noise reduction in post-processing as a result of shooting at a high ISO, but there are not ways to fix a slow shutter later on. If your stars are trailing or your aurora is smeared and lacking detail, you cannot fix that later on.
Get the shutter speed dialed in, max out your aperture, and crank your ISO as low or high as it needs to be to get the shot right!
Also, shooting with bright moons can help a lot! I was able to capture the image below at ISO 250 because I was shooting with a full moon… we even managed to get a lunar rainbow, which I had previously never seen!

Other Camera Settings to Consider when Photographing Aurora
You’ve got your manual camera settings dialed in, so what else should you consider? Depending on equipment and skill level, some of you may want to consider the following settings to adjust prior to shooting.
If you do not know how to adjust these on your camera, consult Google or YouTube, or your user manual.
- Drive Mode: 2 Second Timer
Rather than the default “single shooting”, set your camera to a 2 or even 10-second delay timer so that you do not have camera shake from pressing the button down. If you have a remote, even better! - Long Exposure Noise Reduction: On
If you do not plan on post-processing your image with advanced techniques for noise reduction, you should turn your Long Exposure Noise Reduction to ON. If you take a 15-second exposure, your camera will go black after it shoots for an additional 15 seconds following. Without getting techy, the camera is using what’s called a “dark frame” to provide you with a cleaner final image.
Of course, if you plan on employing stacking or blending techniques, you should leave this OFF.
Manual Focus when Photographing Aurora

This is one of the most difficult things for beginners and even some advanced users to master, but I assure you it is not that difficult. Whenever you are photographing nightscapes, you will want to shoot using MANUAL FOCUS.
Beginners, you can change your lens from Auto Focus to Manual Focus with a small switch on the left-hand side of the lens (usually indicated AF/MF.) Just make sure that is switched to MF.
To find focus in the dark, we will use the stars!
If you are using a DSLR, you will need to use LiveMode (aka your screen, NOT your viewfinder). If you are using a mirrorless, use whichever you can see better with.
On the back or top of your camera will be a button to “Magnify Focus”. It is usually indicated with a magnifying glass icon. Press this button twice so that you are magnified as much as possible.
Then, use your navigation arrows on the back of your camera to locate a star that is bright enough to truly stand out.
If you have a camera that allows you to target selected areas to focus on, it may be easier to place your focus box over a bright star first, then magnify focus. If you have a touch screen, touch the brightest star first and then magnify.
With that star magnified as much as possible, rotate the adjustment ring at the front of your lens back and forth, noticing how the stars blur and focus. It will be easy to tell when its relatively in-focus, but how do we know when its perfect? The trick is to make that star appear as small as possible!
Take a moment to get this right, as it is vital to the result. Truly hone that focus in until that star is a perfect dot, then leave it alone. If you get this right the first time, you should be done for the night, but it is always good to check the focus whenever you switch compositions or move to a new location in case it got knocked.
If you have never practised manually focusing before, try to take your camera and tripod out at home and set it up looking at a light in the distance Apply these same concepts to make the light appear as small as possible and check your results.
If you wait until you are in the field, you risk getting it wrong or forgetting something important in the excitement of the moment.

🌉 Useful Tips for Photographing Aurora
The two of us work very hard to create these free travel guides to help you plan your dream vacation. If you think we’ve done a good job and would like to say thanks, please consider clicking the donate button below 🙂
Practice BEFORE Visiting
This is it! You’ve found clear skies, the aurora is going nuts, your settings are dialed in, and your focus is perfect. The camera shutter is snapping away while your heart thuds against your chest and you realize you’ll have this precious moment immortalized forever. That’s pretty exciting, isn’t it?
This is why you need to practice, especially if you are a beginner. Print this aurora photography guide out and practice on a night in your neighborhood!
Make sure you know how to get your settings dialed in quickly, achieve focus, and have results that are sharp and free of camera shake.
Camera Care in Cold Environments
I also want to mention a word on caring for your camera in such an extreme environment. Going in and out from the bitter cold back to warmth can create condensation issues, especially if your camera is not weather-sealed (or even if it is.)
The best thing you can do to prevent sensor spots and moisture-related issues is to prepare a large sealed ziplock bag with a few silica packs to put your camera into when going between indoor and outdoor environments. Its a cheap, easy way to ensure your camera, and images, stay safe.
Composing Aurora Photography

As a landscape photographer, I compose my aurora photography the same way I compose for sunsets. That is, I make sure my foreground is interesting, find a subject, and treat the amazing sky as an exclamation point.
However, sometimes the sky IS the subject, and you should try as many things as you can if given the opportunity! Try leaving the foreground out entirely, shooting directly up at the sky.
If you have a mid-range lens available, such as a 50mm prime, try filling your frame with just the northern lights and shooting it as something of a portrait.
If you have a telephoto lens, try focusing on one distant tree, mountain peak, or shape, isolating that subject against the brilliant green sky! Be creative and enjoy this special moment.
💻 Post-Processing: Aurora Photography Noise Reduction
This part is only for the pros! If you are not processing your images with advanced photography software, this will likely be outside of your depth for the time being.
I am going to assume that you already know how to use the Details panel in Lightroom for noise reduction, or have some preferred secondary software for the purpose.
Reducing noise in aurora photography is no different from any other form, but there are some tricks to producing clean foregrounds that I will go into below.
Getting a clean, noise-free foreground is the most challenging element of night photography.
In fact, the majority of the aurora photos that you love with completely noise-free foregrounds are most likely a composite of some kind, but that doesn’t make them “fake”. Below are 3 methods of cleaning up your foregrounds to create truly inspired aurora photography.
Stacking For Noise Reduction

While you can technically stack your photos for noise reduction in Photoshop, I highly recommend downloading stacking software for this. If you are a Mac user, Starry Landscape Stacker is the best! For PC users, download Sequator.
Stacking software requires you to take consecutive photos with identical settings, one after the other. It will then compare your photos pixel by pixel to determine which pixels are “hot” (aka creating noise) and which have correctly captured the scene.
When photographing aurora or Milky Way, I often shoot at ISOs as high as 5000 or even 6400 and end up with clean, well-exposed images by stacking my photos.
The software will guide you through the post-processing part of the process, but you will need to get it right in the field first!
Basically, set your tripod up and rattle off at least 5-10 consecutive shots. If you have a remote, this is easy. If not, your camera might have a “consecutive shot” setting in your drive modes, or maybe even an intervalometer.
Personally, I always take at least 5-25 to stack if shooting above ISO 800 to make sure my images are noise-free.
As for settings, shoot with your priority on aperture and shutter speed, then boost the ISO to whatever you need to get a well-exposed image.
As I mentioned, I will often boost this as high as 6400 when shooting Milky Way photography and have images I feel confident printing at poster sizes.
Once you have the 5-25 images, you will need to adjust some settings in Lightroom, export them as TIFFs, and take them into the stacking software to clean them up. The entire process is explained when you use the software.
Long Exposure Foreground Blend

This trick requires Photoshop, but nothing else. Essentially, you are going to ignore the sky entirely for one frame, focusing instead on capturing a well-exposed foreground at a low ISO.
Your exact settings here will vary based on how much lunar and/or polar light you have available. Basically, max out your aperture, get your ISO down as low as you can (I’ve even shot at ISO 100 on full or nearly-full moons), and set up your shutter speed for as long as you can, up to 5 minutes or so. You won’t want to go beyond that as you will heat up your sensor by doing so.
In this shot, your aurora will be a green smear and your stars will be long, trailing lines. However, your foreground should be well-exposed and completely noise-free!
With the camera on the tripod in the exact same position, adjust your settings for the aurora instead and shoot the sky so it looks nice, ignoring the foreground altogether.
With your second shot exposed for the highlights instead of the overall scene, you should be able to get some lower ISO shots for the sky even at a faster shutter speed.
In Photoshop, you will open both your foreground image and your favorite aurora image as layers, align these layers, then create a mask that blends the two together. As happy as I would be to explain that process here, I’m afraid YouTube will be your best bet to learn that process!
Blue Hour Blends

The dirty little secret of astrophotography is the blue hour blend. This is essentially the same as the technique mentioned above, except that the photographer will set their shot up during blue hour or astronomical twilight while there is still ambient light available to shoot with.
The idea of the blue hour blend is that the photographer is able to get a foreground exposure at ISO 100 with a sky that is easily masked out. They will then leave everything exactly as is and shoot the Milky Way or aurora hours later, then blend the two in Photoshop.
Technically speaking, all of the methods listed above are “composites,” as they all require multiple photos to create one image. However, ethically there is a bit of a divide. Many photographers are even known to shoot numerous blue hour compositions throughout their life and later insert whatever skies they like.
I have often said in my previous travel and photography guides that I am not here to condemn or condone, but simply to educate. It is up to you which of these methods you feel comfortable using, but all will provide very clean aurora photography.
🧐 Final Thoughts on Photographing Aurora
The two of us work very hard to create these free travel guides to help you plan your dream vacation. If you think we’ve done a good job and would like to say thanks, please consider clicking the donate button below 🙂

I truly hope you have found this guide on photographing aurora helpful, regardless of your current skill level. Coming home with a photographic souvenir of an unforgettable night is something I hope EVERYONE is able to experience as I did.
If you plan on buying a new camera for your big trip and want some guidance on that, you may be interested in reading my guide to choosing the best camera for you. I also welcome comments and emails if you would like some personal advice!
You’ll also find other photography guides on our Learn Photography page.
Enjoyed reading my Photographing Aurora: A Guide to Aurora Photography? PIN IT! ?


Do you sell prints of your Aurora pictures?
Hi Kaye,
Yes we do sell prints although we don’t currently have this as an option on the website. You can contact us at [email protected] to arrange prints.
Sophie and Adam
Is it hard to go there at age of 72 ?
When is the best season ?
How long do we need to stay there ?
How much will be the cost, all inclusive (acommodation, meals, transportation, guide etc ) ?
How many persons to join minimum ?
I’m presuming that these questions are directed at a trip to Iceland. Unfortunately, those would be questions to answer a travel agent. This guide was designed specifically to help people learn how to photograph the aurora. With that in mind, it is only visible during the winter months and Iceland is very expensive to travel.
Such a great guide. I love the idea of the blue hour blends. Even though I am not a pro photographer and am not 100% sure I understand it but hopefully I can try it sometime soon!
I am 70 years old and in January am going on a Hurtigruten voyage along the coast of Norway, from Bergen to Kirkenes and back, 11 nights. There should be plenty of opportunity to observe the Northern Lights. If you use Facebook, have a look at the group called Hurtigruten Insiders. There are lots of good tips there. If you decide to book a Hurtigruten voyage, be sure to do it on the Norwegian site, not the US site, as the prices are better on the Norwegian site. Also, right now you can book a voyage without single supplement right through next summer. I think the sale runs until the end of December.
Fantastic tips, and your photos are simply stunning! I feel like even with lessons I wouldn’t have half as impressive results. You are a star!
We did go to Iceland but we were unlucky with the clouds so we never got to see the Aurora. You have been soooo lucky with your trips Sophie.
Wow, I have never seen such stunning photos of the Aurora before! Your photography skills are on another level! Truly. As a beginner photographer, I think I will be reading more of your photography tips going forward.
Thank you so much! We will definitely have some more photography blogs coming out soon 🙂
Excellent page! I have a book, but this is handy to have on my phone to study at odd moments. Thanks!
Thank you Lynn. I’m really glad you found it helpful 🙂
Excellent guide!
As far as I might be concerned, photography is a craft of perception. It’s tied in with discovering something fascinating in a standard spot… I’ve discovered it has little to do with the things you see and everything to do with the manner in which you see them.
That is beautifully stated Nicki; I couldn’t agree more!! The mantra we like to recite is “get THAT shot, then get YOUR shot.” What we mean is of course you want the iconic shot, its hard to resist and is often the most pleasing composition, but once you have it the next thing you need to do is find a composition uniquely yours, telling the story as YOU see it 🙂
Hello, i was in Lapland some weeks ago. I took some aurora pictures and unfortunately I have a lot of blurry on the first floor ( trees mostly – the foreground was full of them! ) and in same cases aurora was not sharped too ( not sure if this was due to my setting or Weak and diffused aurora) and the pictures are not very nice for printing. What went wrong?
Was is it necessary to use a AF for trees and perform 5-6 images at different focus in order to have a sharper foreground? Which is the correct WB for the sky?
Many thanks
Angela
Hi Angela. It sounds like you haven’t focused the images properly. At night you’ll need to do this manually as the scene will be too dark for the AF to function. You may find if the sky is well focused, the foreground will not be as this is much closer to the camera. You can indeed compensate for this by focus stacking if you wish for the image to be tack sharp across all focal distances. As for the correct white balance, if you’re shooting in RAW (which I’d highly encourage) the white balance settings will not affect the image data.
Impressive photos! Seeing the northern lights has always been on my bucket list. I hope I can visit one day and create my own shot.
Thank you so much Lauren! I truly hope you’re able to see them one day, it is an amazing experience and a wonderful natural phenomenon to photograph 🙂
Your information was easy to understand for a soon to be chasing Aurora’s in Fairbanks couple! Do you use any type of filter on your lens i.e. polarizing, or clear filters when shooting auroras?
This is so nice of you to say and take the time to write Peter! And I’m a little jealous of your trip, I need to get to Alaska! I do not recommend any filters typically, especially not a CPL as it will bring your exposure down a step or two and you aren’t really looking to cut any glare or reflections typically. Some people use an upside-down graduated filter so they hold the shutter open longer for the foreground exposure without risking losing detail in the bright aurora, but this is seldom necessary except during perhaps an insanely bright aurora on a absolute new moon. If you happen to have a graduated you could give it a shot at some point, btu I certainly would not go out and buy one 🙂